Unity ComfyUI Bridge
A runtime bridge connecting Unity to ComfyUI. Execute workflows for Image, Audio, and 3D Model generation with support for RenderTextures and a non-blocking queue system.
com.aminhp.comfyui-bridge Install via UPM
Add to Unity Package Manager using this URL
https://www.pkglnk.dev/comfyui-bridge.git README Markdown
Copy this to your project's README.md
## Installation
Add **Unity ComfyUI Bridge** to your Unity project via Package Manager:
1. Open **Window > Package Manager**
2. Click **+** > **Add package from git URL**
3. Enter:
```
https://www.pkglnk.dev/comfyui-bridge.git
```
[](https://www.pkglnk.dev/pkg/comfyui-bridge)README
Unity ComfyUI Bridge
A robust, node-based integration tool that connects Unity to ComfyUI at runtime. This asset allows you to generate Images, 3D Models (GLB), and Audio, or manipulate RenderTextures directly inside your game or application using the ComfyUI API.
Features
Workflow Engine: A single component that supports Text-to-Image, Image-to-Image, Inpainting, Audio Generation, and 3D Model generation.
Node-Based Configuration: Configure Prompts, Seeds, Steps, and Input Images using a visual list in the Unity Inspector.
Runtime Queue System: "Fire and forget" execution queue handles multiple requests sequentially without freezing the game.
RenderTexture Support: Pipe your Unity Camera output directly into ComfyUI as an input image.
Output Types:
- Image (Texture2D / RawImage)
- RenderTexture (Blits result to a target RT)
- Audio (WAV/MP3/FLAC support)
- Object3D (Spawns GLTF/GLB models at runtime)
Dependencies
This asset requires the following packages installed via Unity Package Manager:
- Newtonsoft Json (com.unity.nuget.newtonsoft-json) - For parsing API data.
- glTFast (com.unity.cloud.gltfast) - For loading 3D models at runtime.
Installation
- Copy the ComfyUI_Bridge folder into your project's Assets folder (or install via UPM/Git).
- Ensure you have the dependencies installed.
- Save your ComfyUI workflows as API Format (JSON).
- In ComfyUI: Click Settings (Gear Icon) -> Enable "Enable Dev mode Options".
- Click "Save (API Format)" button.
- Place your .json workflow files into Assets/StreamingAssets/Workflows/.
Core Files Structure
Ensure your plugin folder looks like this:
ComfyUI\_Bridge/
├── Editor/
│   ├── ComfyBridgeMenu.cs
│   ├── ComfyNodeConfigDrawer.cs
│   └── ComfyWorkflowExecutorEditor.cs
├── Runtime/
│   ├── ComfyDataModels.cs       \<-- Data definitions
│   ├── ComfyManager.cs          \<-- Connection handler
│   ├── ComfyNodes.cs            \<-- Node configuration logic
│   └── ComfyWorkflowExecutor.cs \<-- Main engine
├── Samples\~/                    \<-- Examples (Hidden from auto-import)
│   ├── Scenes/
│   ├── Scripts/
│   └── Textures/
Quick Start
1. One-Click Setup
In the Unity Toolbar, go to Tools > ComfyUI Bridge > Quick Setup.
This will automatically create a ComfyBridge object in your scene with the necessary ComfyManager and ComfyWorkflowExecutor components attached.
2. Configure the Executor
Select the ComfyBridge object in your scene.
- Workflow File Name: Enter the name of your JSON file (e.g., text2img_api.json).
- Expected Output: Select the type (Image, Audio, Object3D, etc.).
- Output Target: Drag your RawImage, AudioSource, or Spawn Transform into the exposed slot.
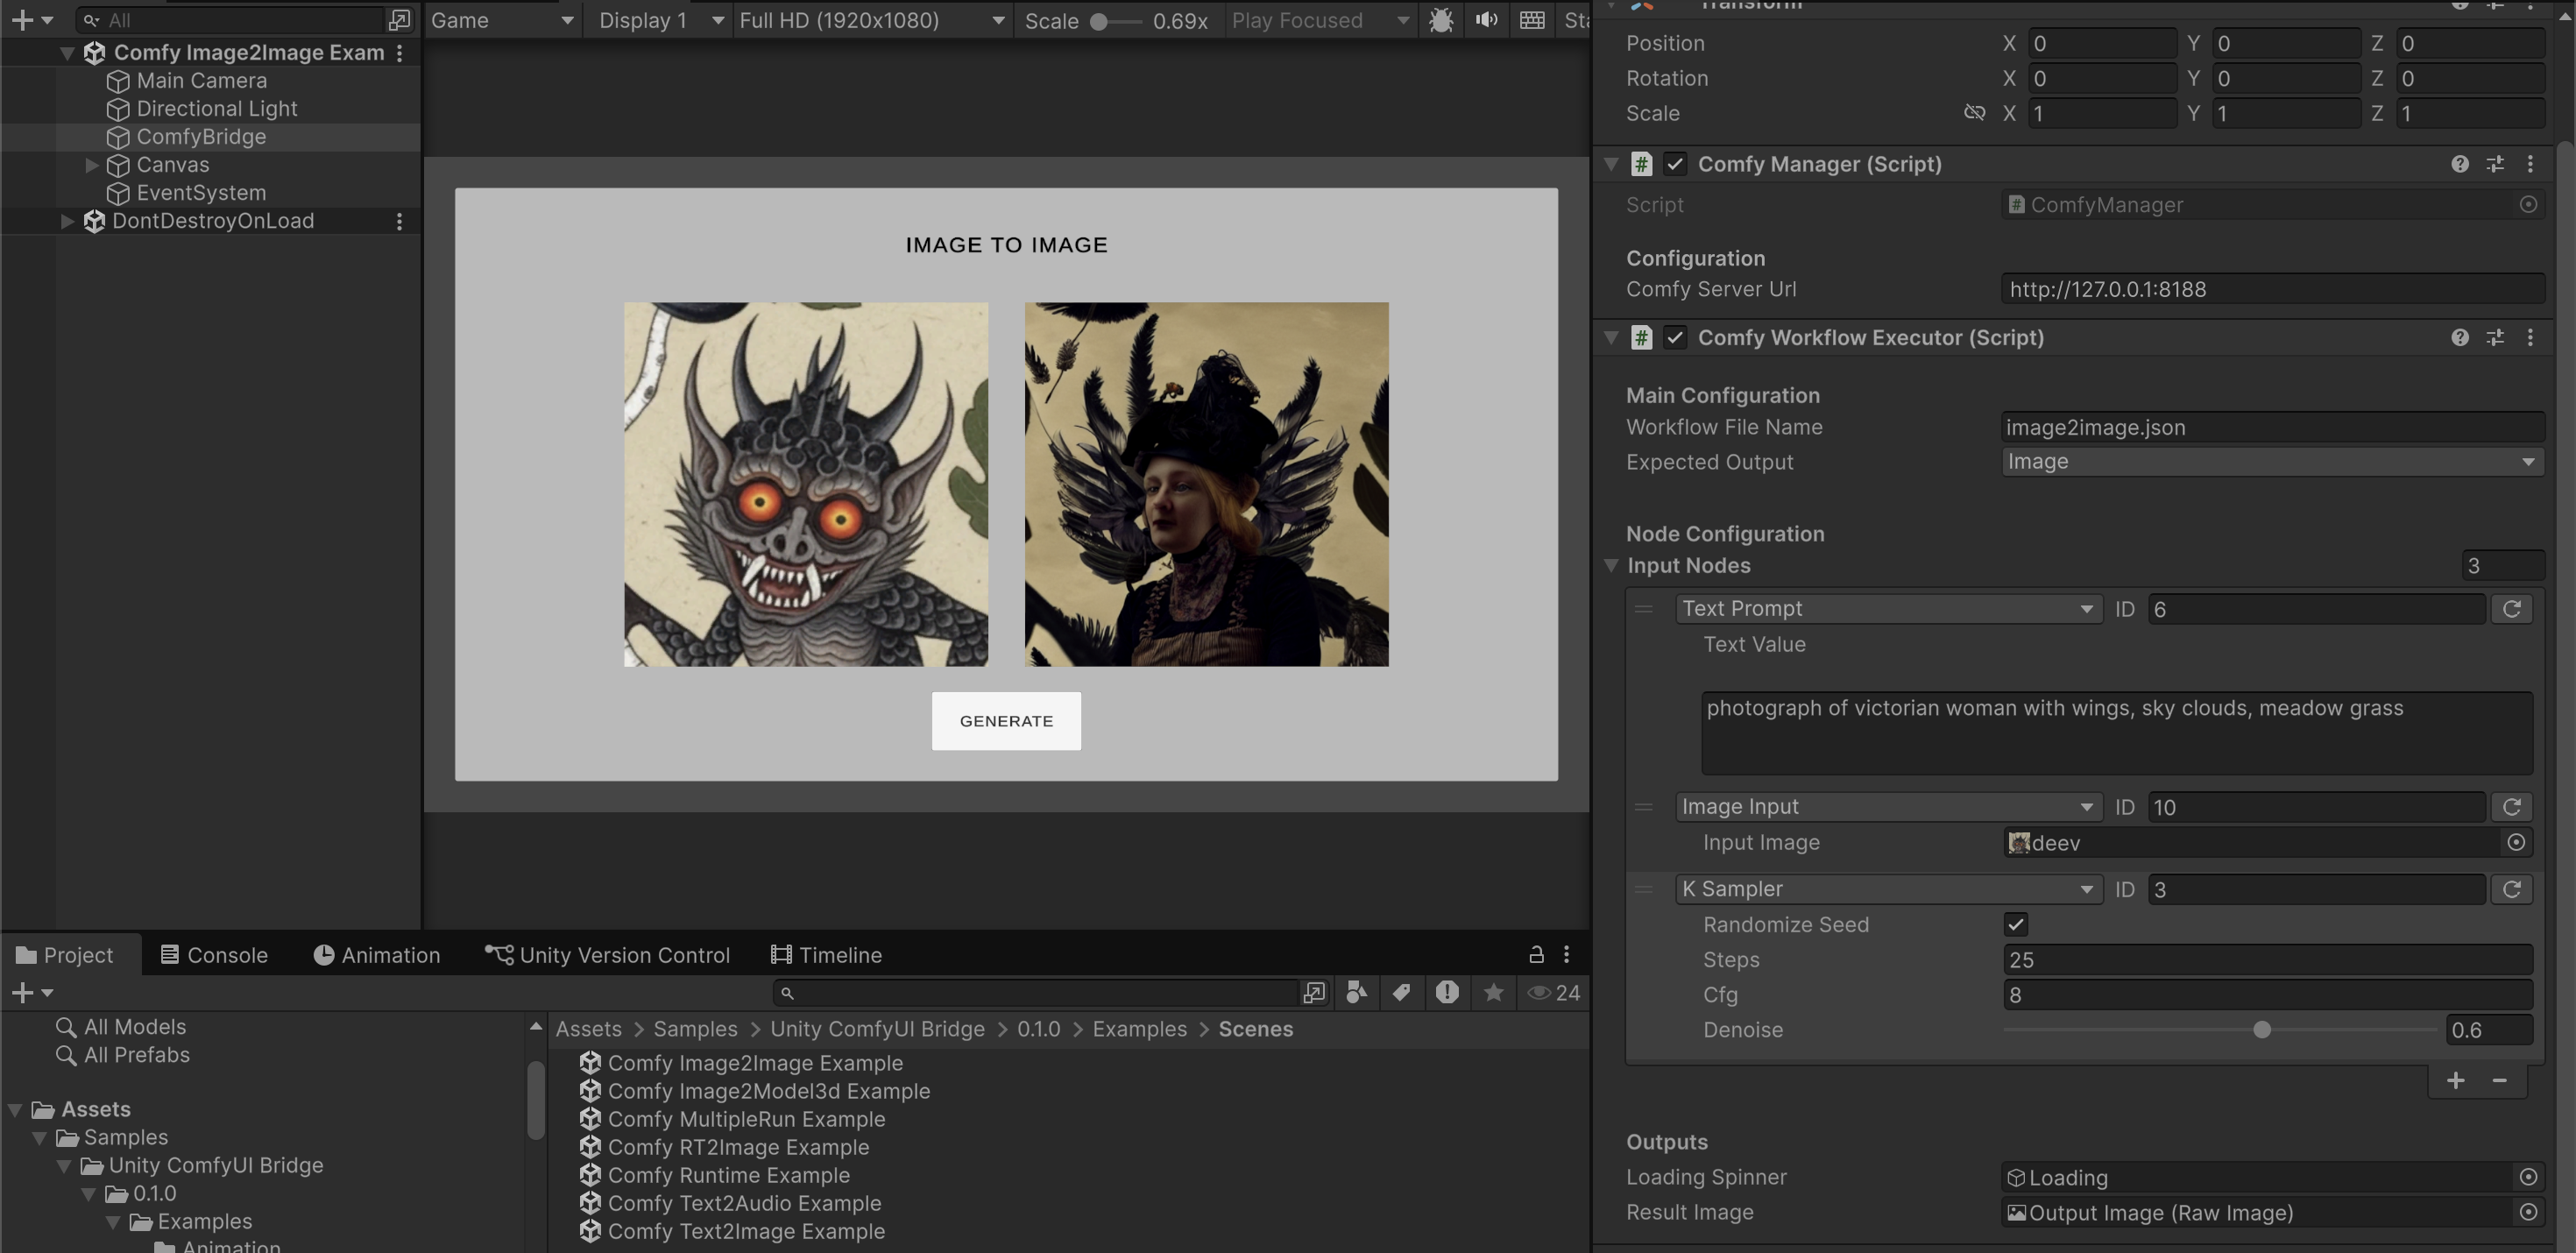
3. Configure Inputs
In the ComfyWorkflowExecutor inspector, look for Node Configuration.
- Click + to add an input.
- Type: Select the type (e.g., TextPrompt, KSampler, ImageInput).
- ID: Enter the Node ID from your ComfyUI JSON file (e.g., "6" for prompts, "3" for sampler).
- Fill in the values (Text, Seed, Input Texture, etc.).
Tip: Click the small "Refresh" icon next to the ID field to auto-load default values from your JSON file.
4. Run It via Code
You can trigger generation from any script using the ComfyUIBridge namespace.
using UnityEngine;
using ComfyUIBridge; // Import the namespace

public class ExampleGenerator : MonoBehaviour
{
    public ComfyWorkflowExecutor executor;

    public void GenerateSimple()
    {
        // Simple Run (Linked to Unity Button)
        executor.Execute();
    }

    public void GenerateQueue()
    {
        // Modify values and Queue (Fire and Forget)
        // This is safe to call multiple times rapidly.
        executor.QueueGeneration(() \=\> {
            var promptNode \= executor.inputNodes.Find(n \=\> n.nodeID \== "6");
            promptNode.textValue \= "A cyberpunk city, neon lights";

            var samplerNode \= executor.inputNodes.Find(n \=\> n.nodeID \== "3");
            samplerNode.randomizeSeed \= true;
        });
    }
}
Output Specifics
- Audio: Supports WAV, MP3, OGG, AIFF. If a FLAC file is received, it will be downloaded to Application.persistentDataPath (as Unity cannot play FLAC natively), and a path will be logged to the console.
- 3D Models: Requires the glTFast package. Models are instantiated at the Result 3D Spawn Point transform.
- RenderTextures: Input RenderTextures are automatically converted to temporary Texture2D assets and uploaded to the server before generation.
Troubleshooting
- 400 Bad Request: Check your Console. The Manager prints the specific server error. This often happens if you send a Float to an Int field (like Steps).
- Image not changing: Ensure your ImageInput Node ID matches the "Load Image" node in your JSON.
- Audio not playing: Unity does not support FLAC natively. In your ComfyUI workflow, please ensure your "Save Audio" node is set to output WAV, MP3, or OGG. If FLAC is used, the file will be downloaded to disk but will not play automatically.
- Namespace Errors: Ensure your scripts include using ComfyUIBridge;.
License
[MIT License]
Comments
No comments yet. Be the first!
Sign in to join the conversation
Sign In